The bane of astrophotographers is, in my opinion, the routine of setting up and dismantling the gear on every session. As time accumulates this becomes a rather tiresome process, hindering the excitement of astrophotography where the need for really accurate polar alignment is paramount.
That is where a permanent installation, a.k.a pier comes into play (provided you are ok, to just securely cover up your gear for protection of the elements).
My mount is a skywatcher HEQ5 PRO Synscan, though the pier can host any type of mount by changing the top adapter.
The design had to comply with the following goals :
a) The leveling of the pier would be on the bottom and it would have to be massive for two reasons:
— Contrary to popular belief, the top does not have to be level. It is better to have a really stiff top since you will be doing drift alignment anyway with a permanent setup.
— There is no point, mechanically speaking, to mount a 40kg steel tube on M13 rods (there alot of tops in the internet with M13 bolts for adjustments which just scream flexure with anything heavier than an ED80 and even more so the same goes for the bottom design
b) There would be no holes in the rooftop in order to protect the water seal in the construction.
So here is the photo story of the building!
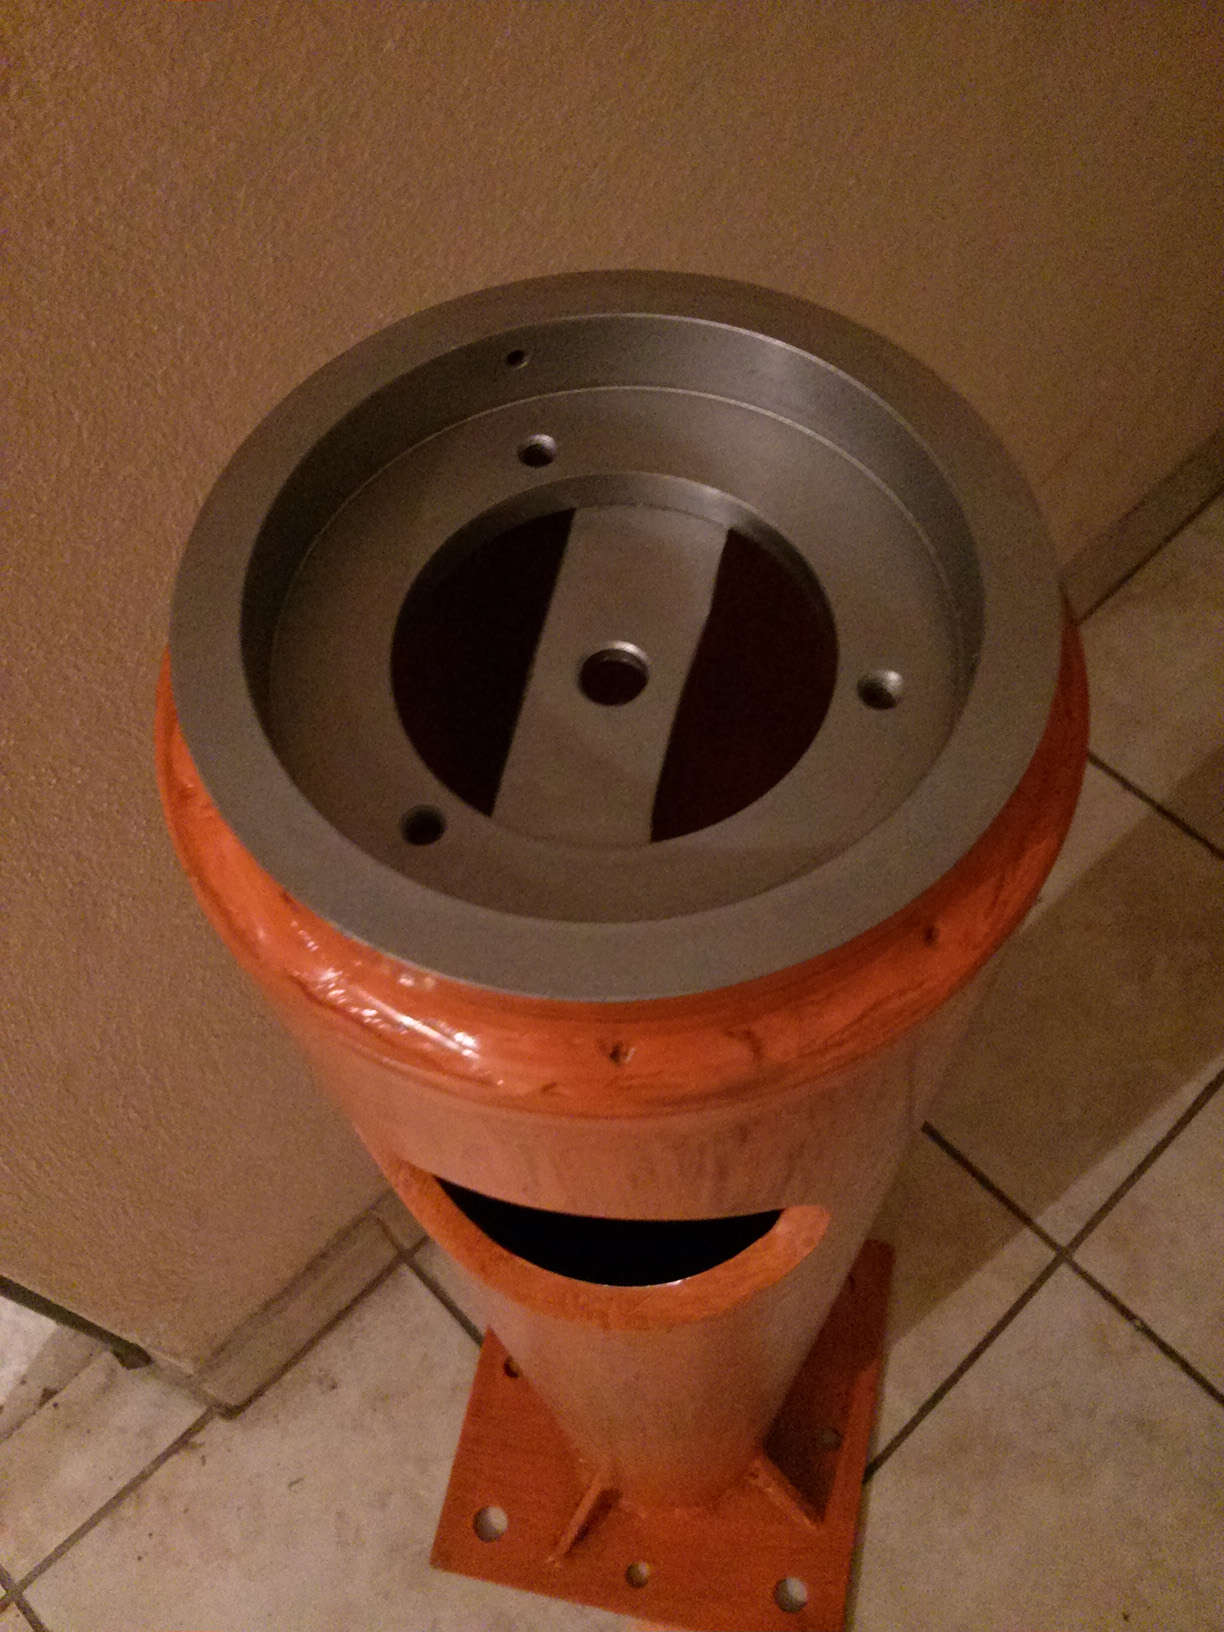
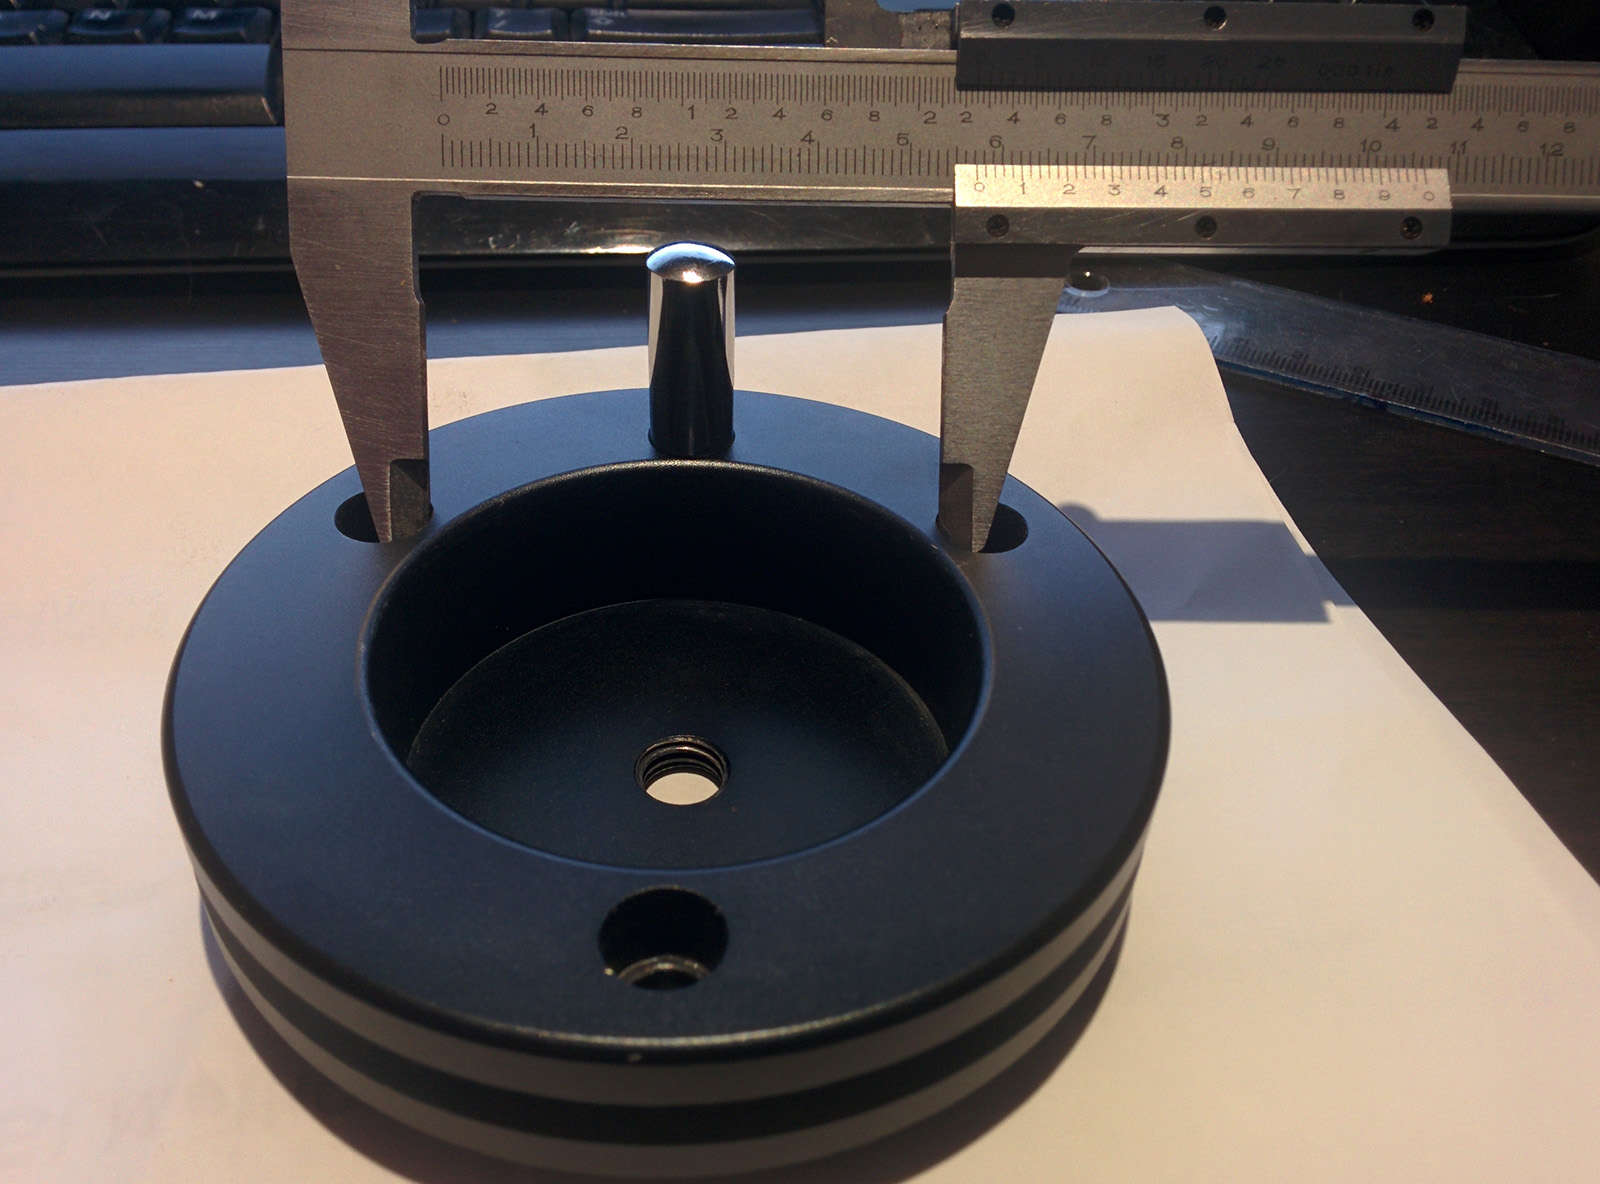 Taking the approppritate mesurements for the fitting the HEQ5 PRO head adapter to pier’s top plate.
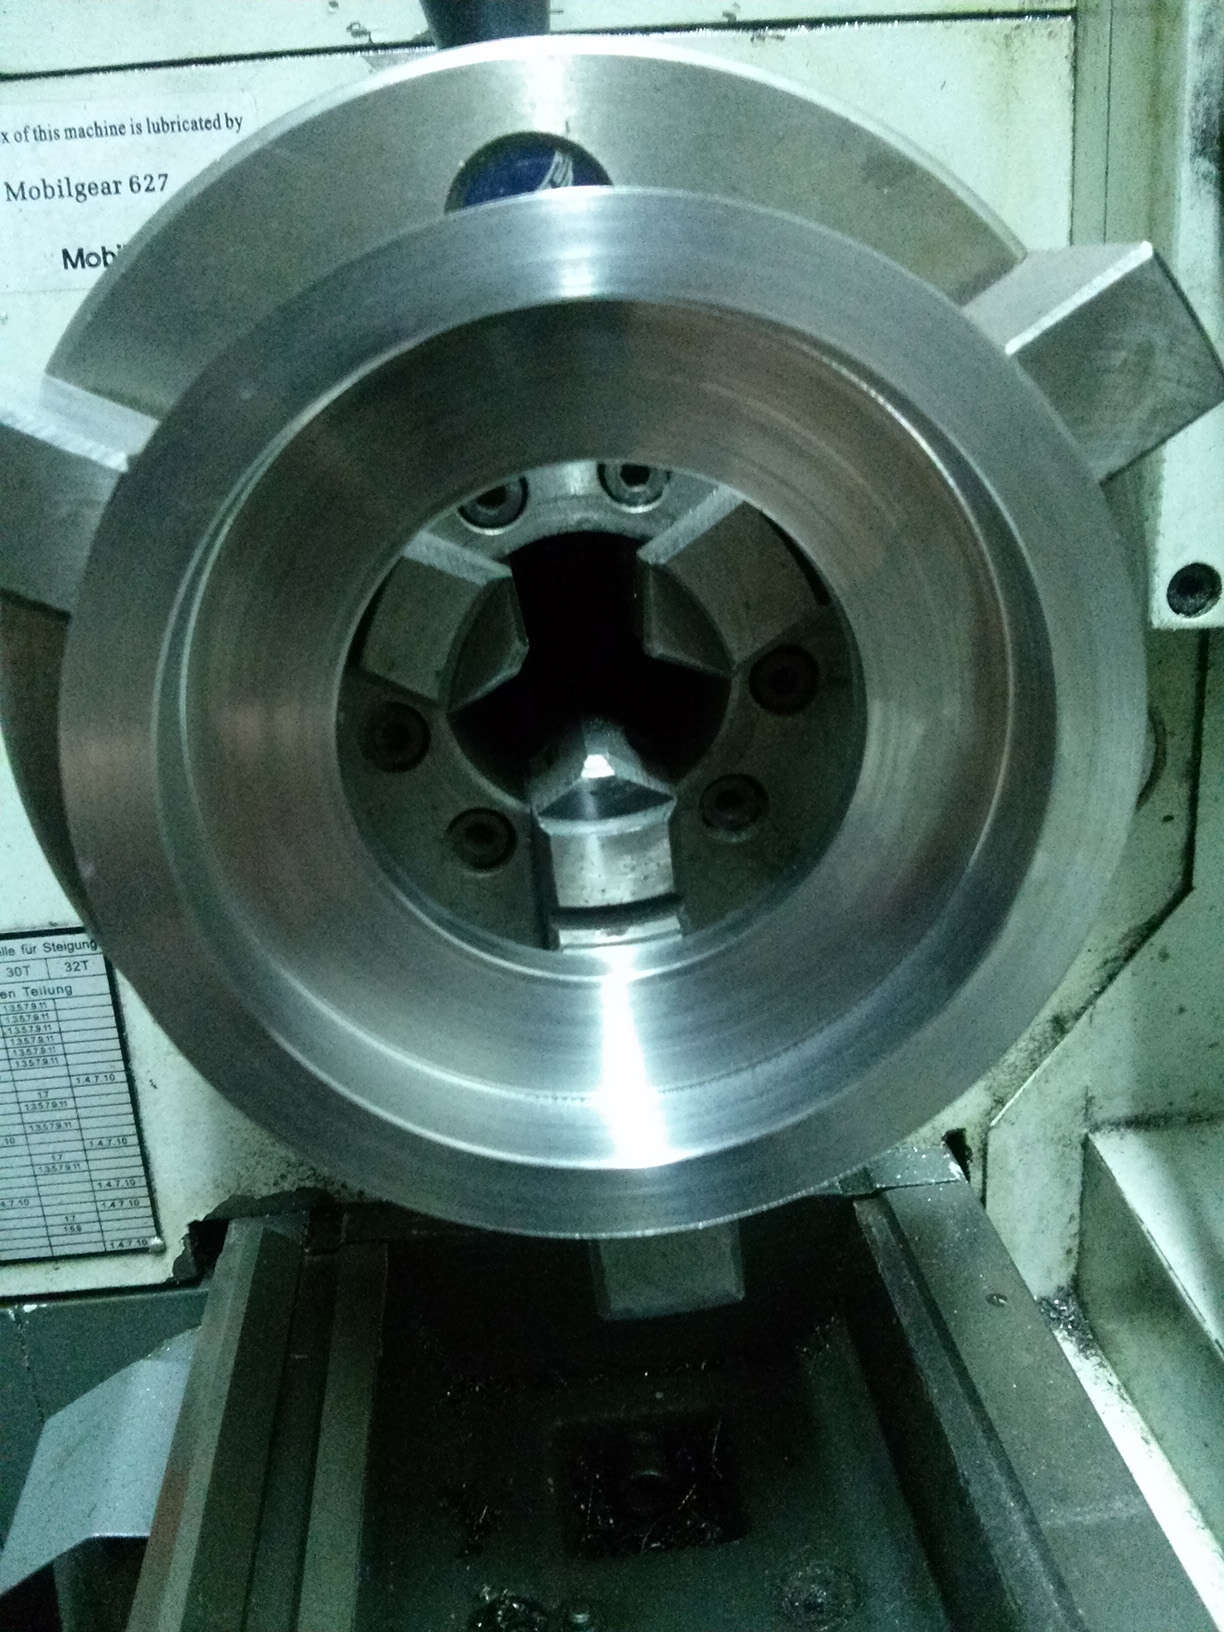 Uber lathe work on aluminium by my brother in law (Thanks Tom!)
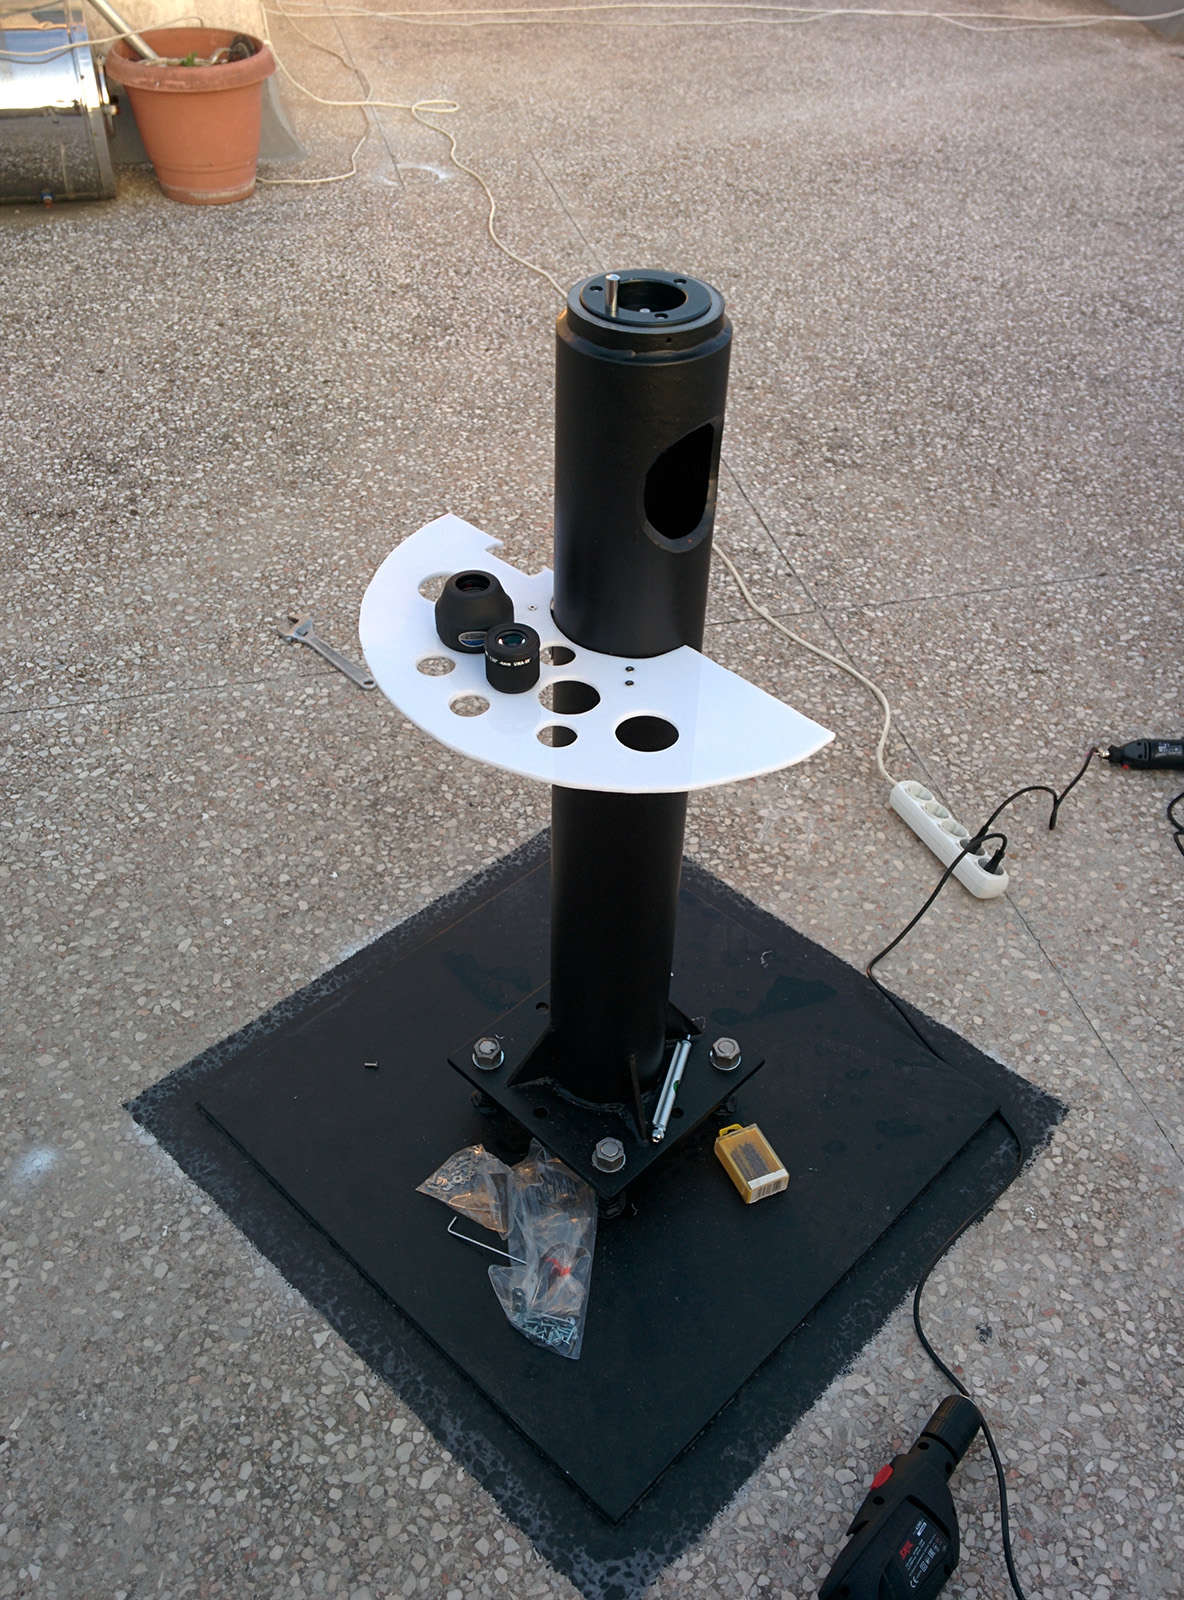
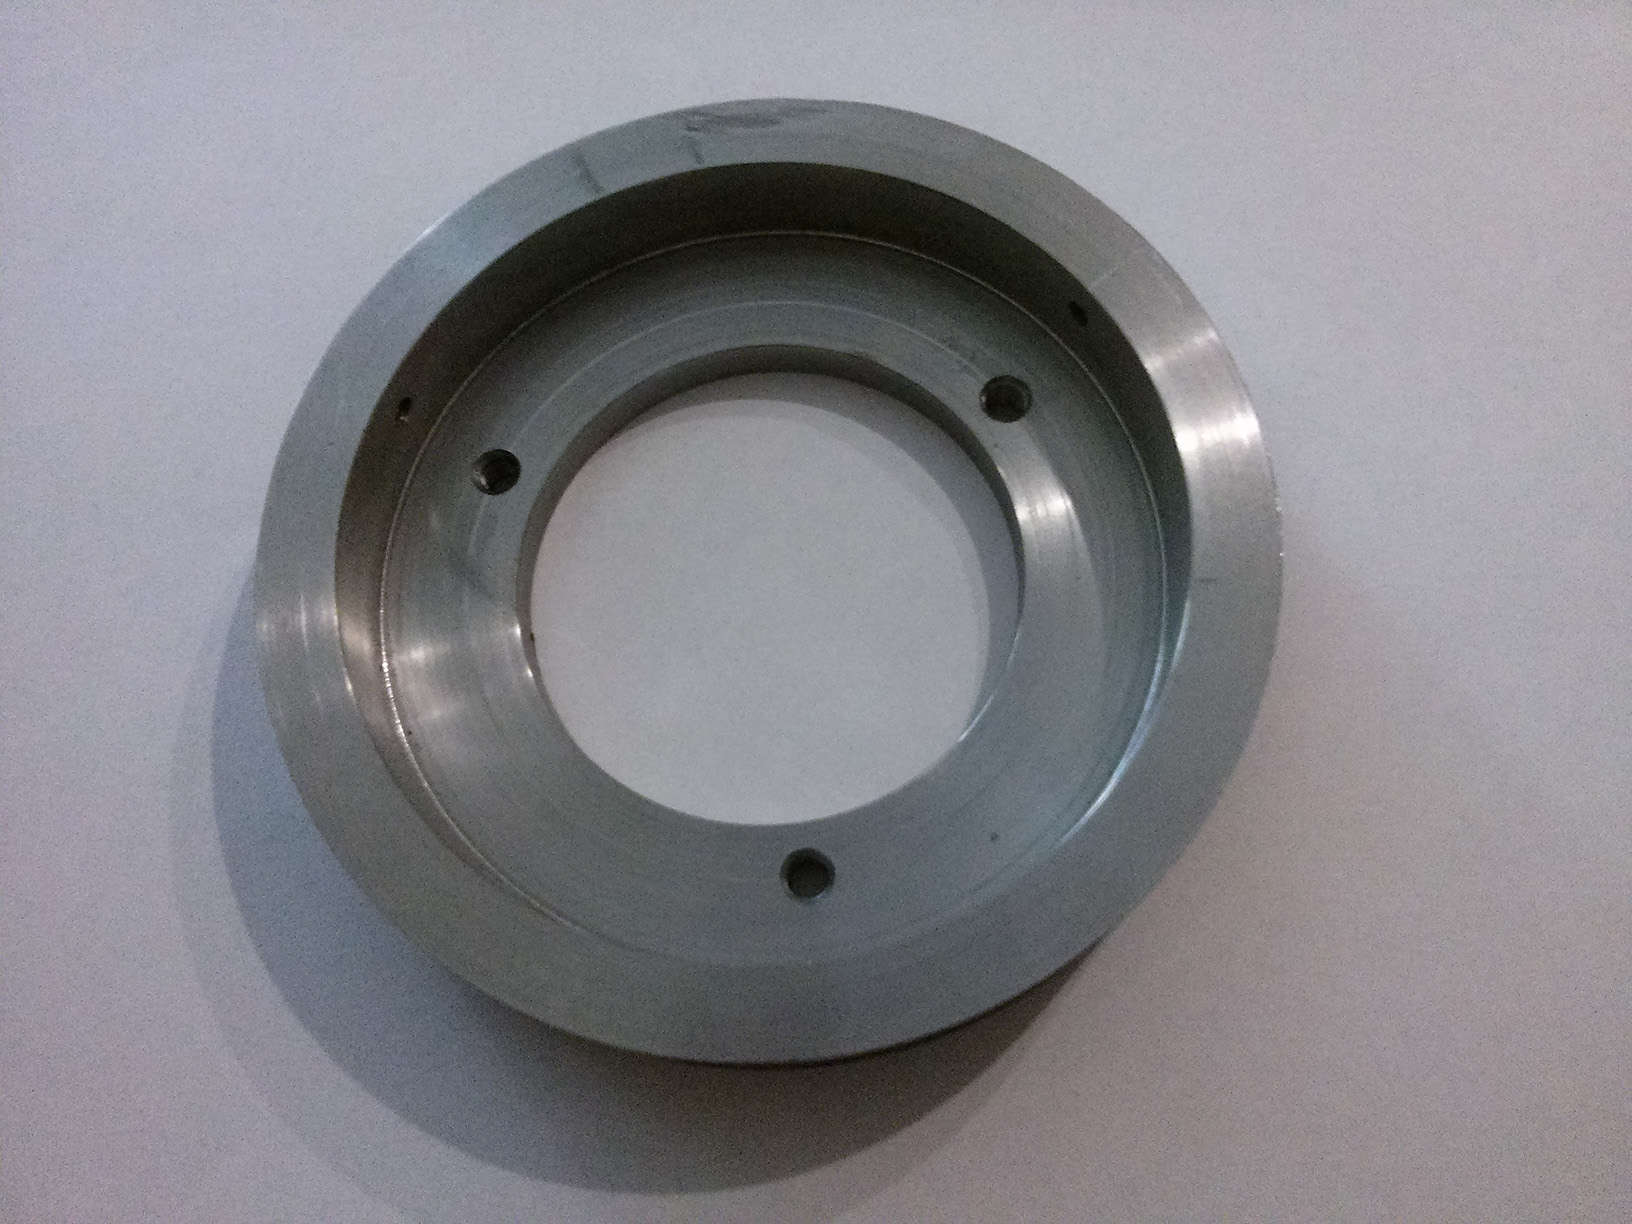 Finished product, top plate ready to be welded on the tube.
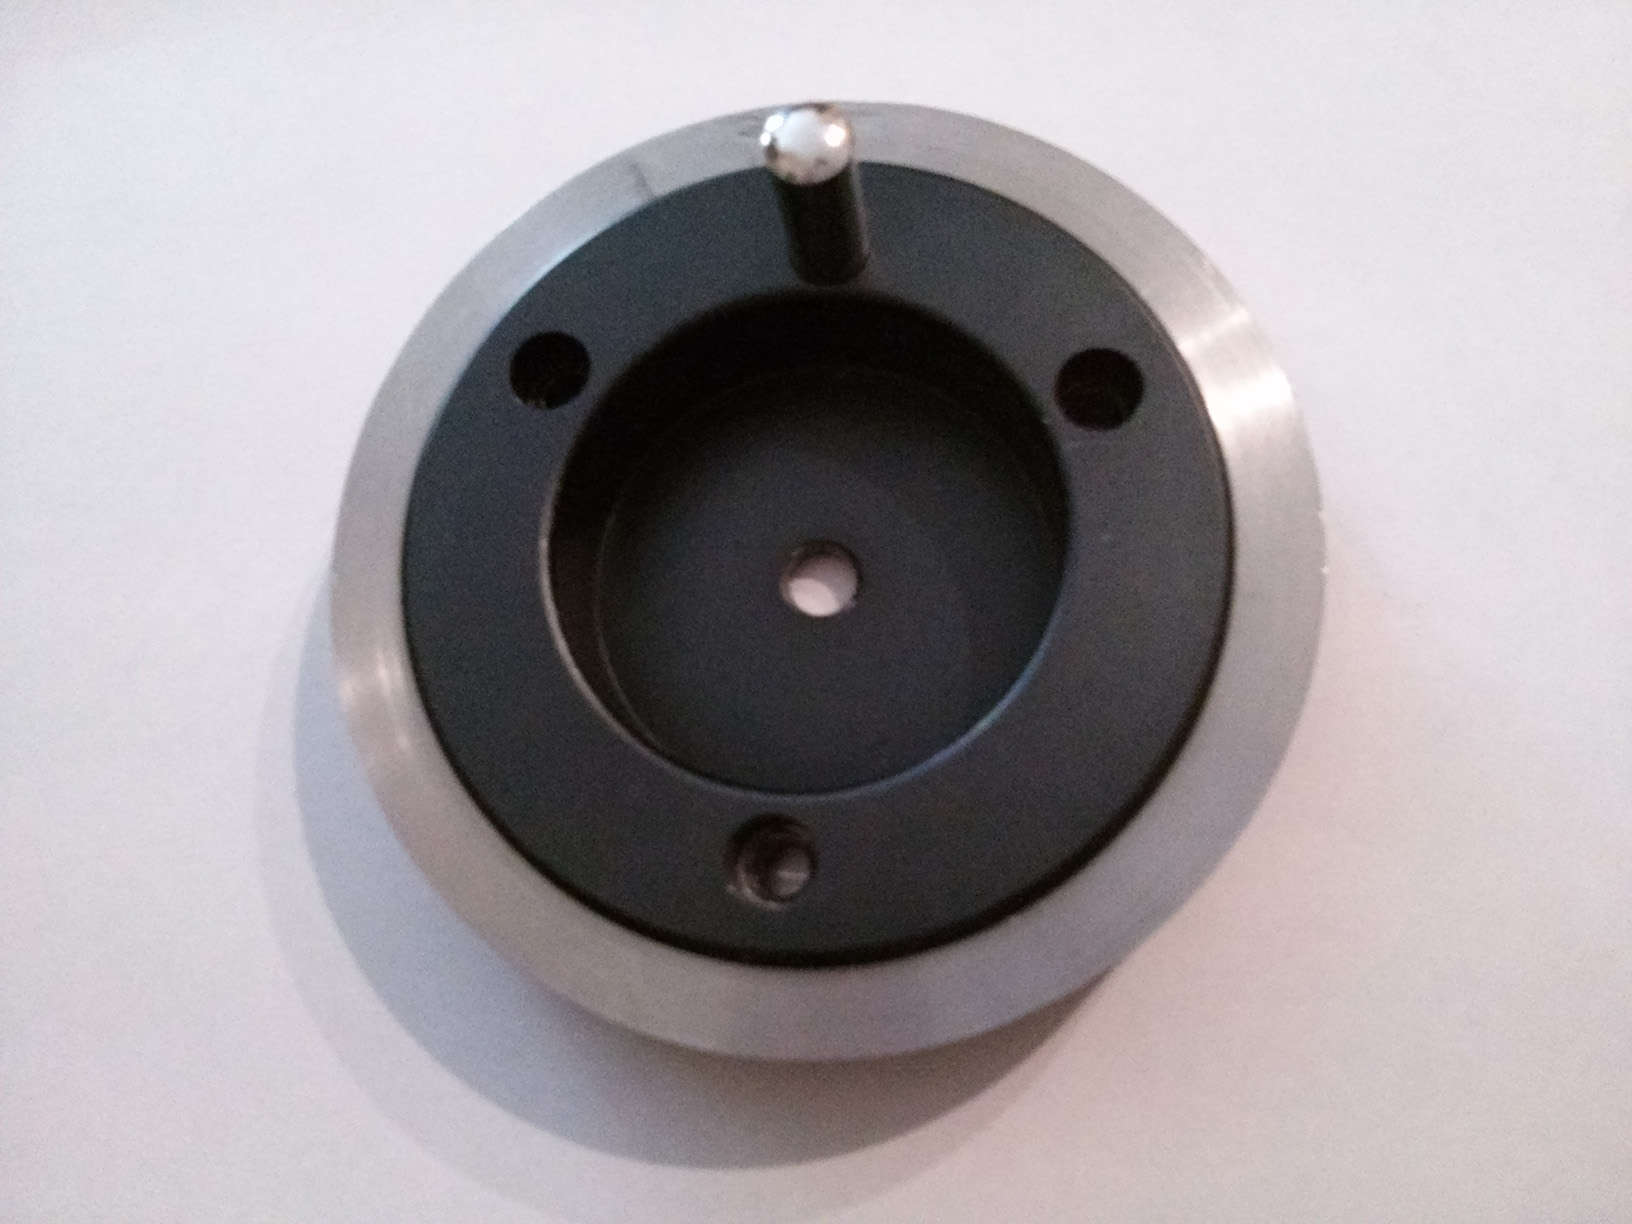 Testing the fit 🙂
 Welding the M30 threaded bars to the base plate. By Tom of course!
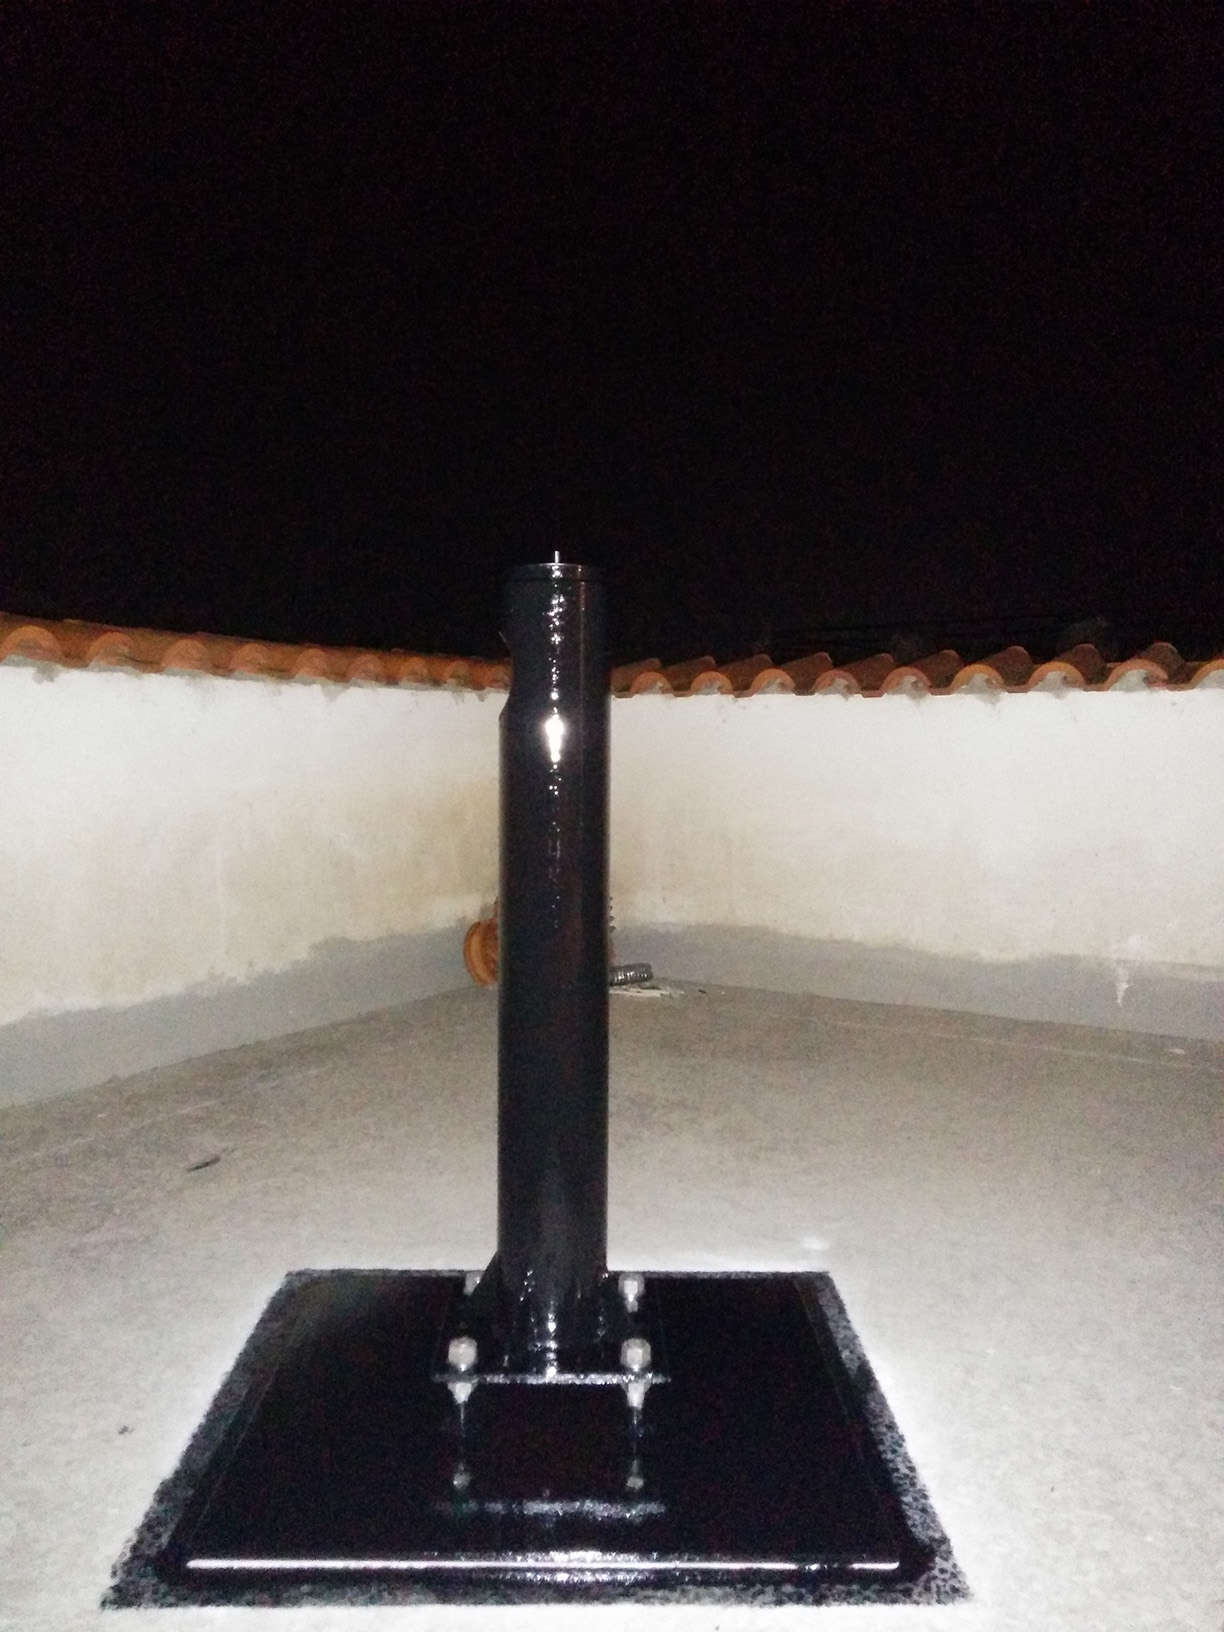
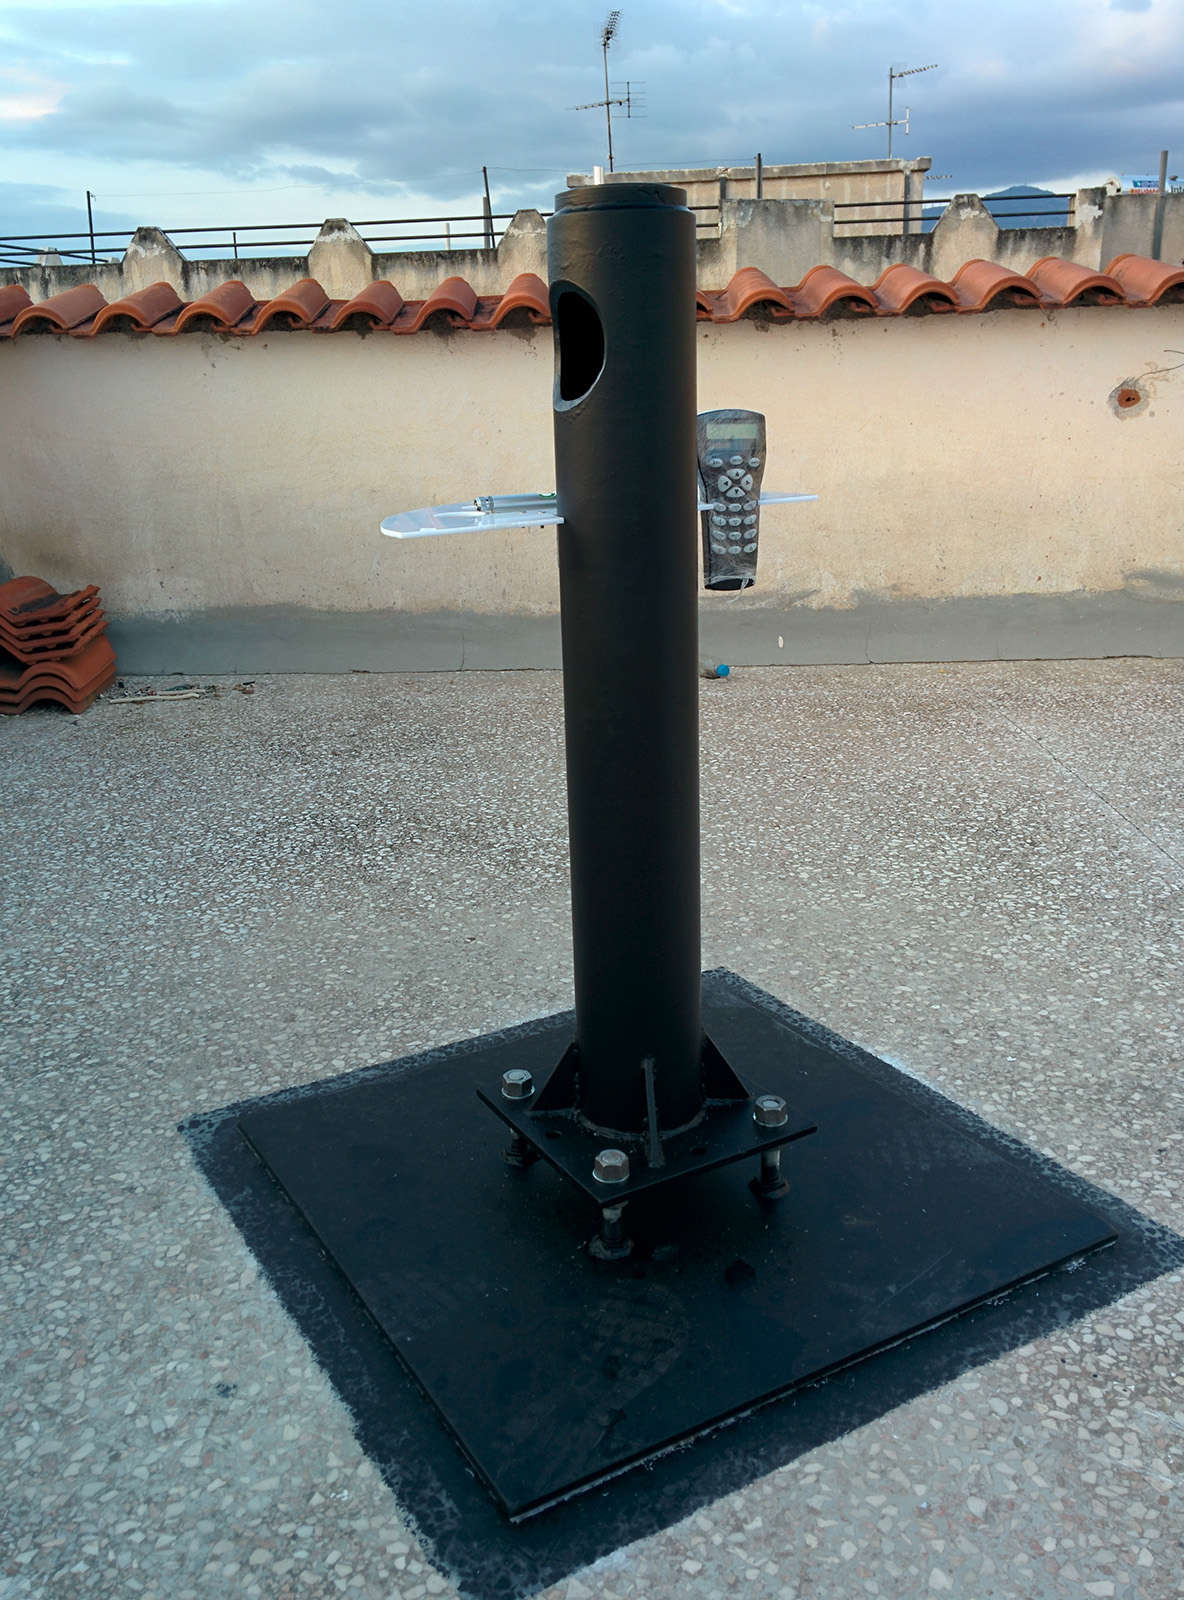
 The pier is ready
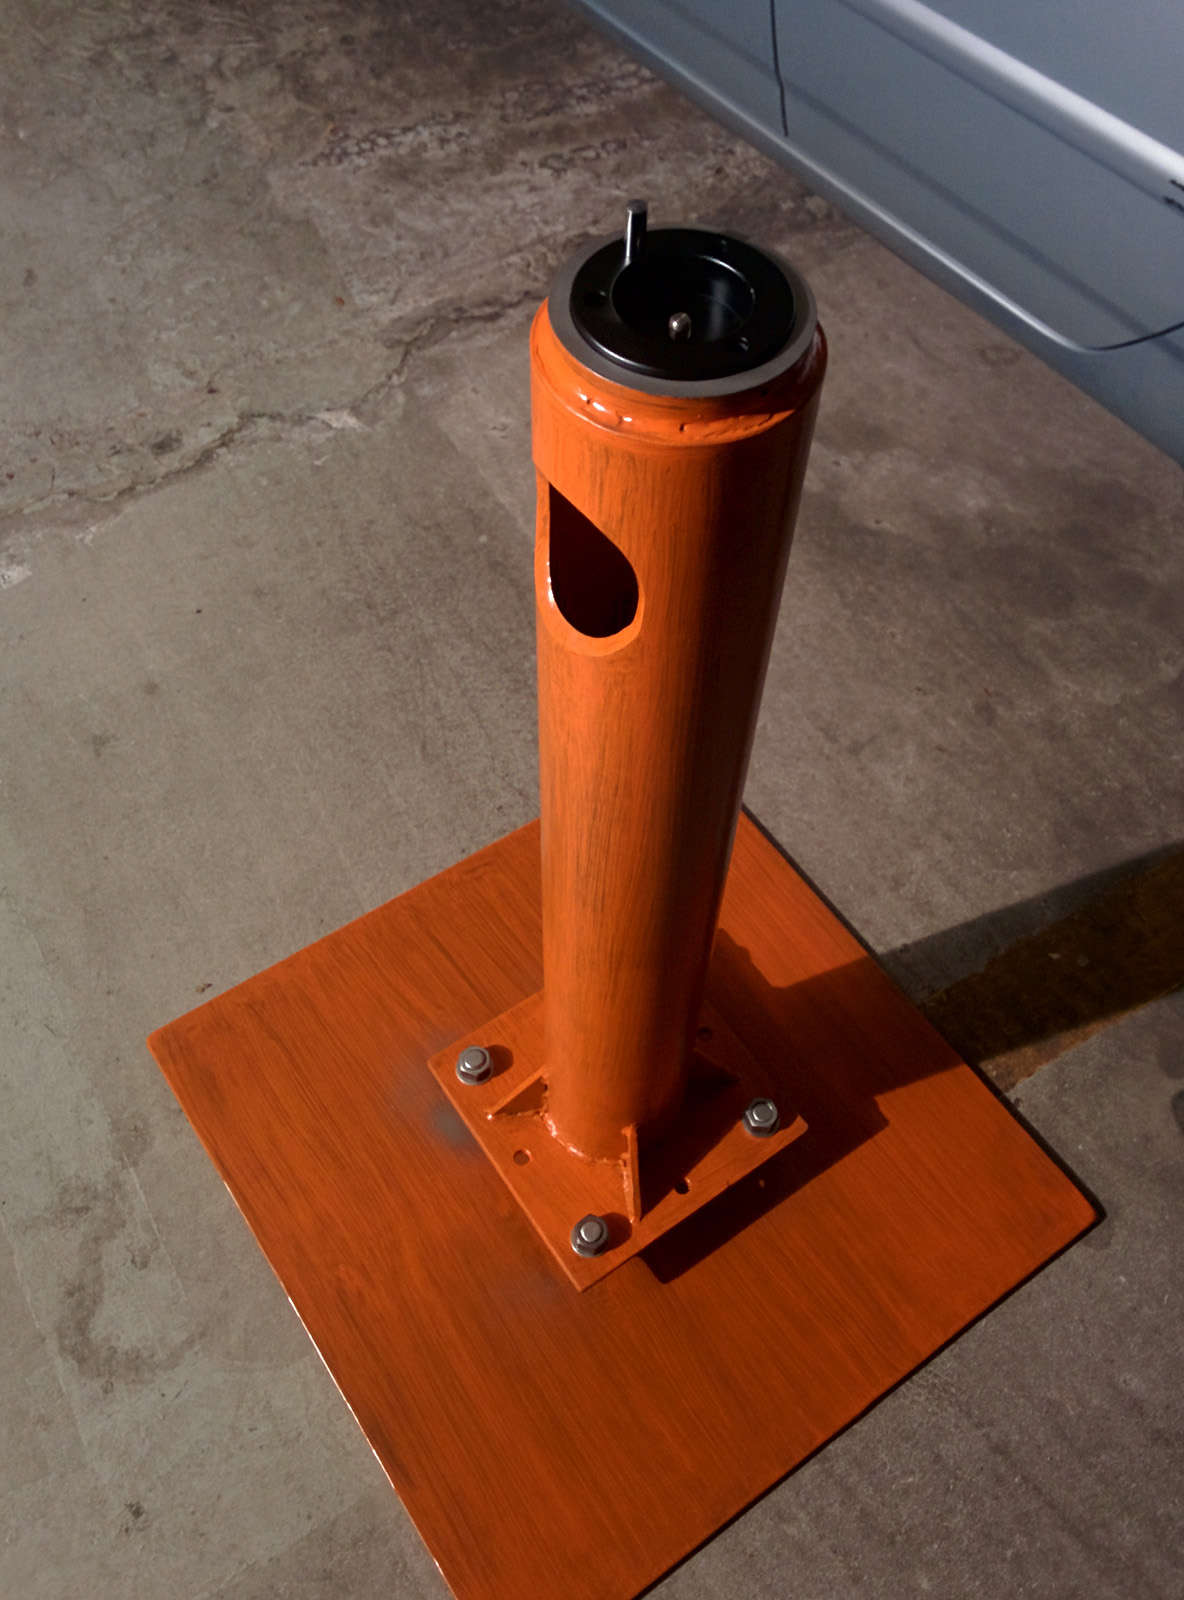 Another view of the finished pier.
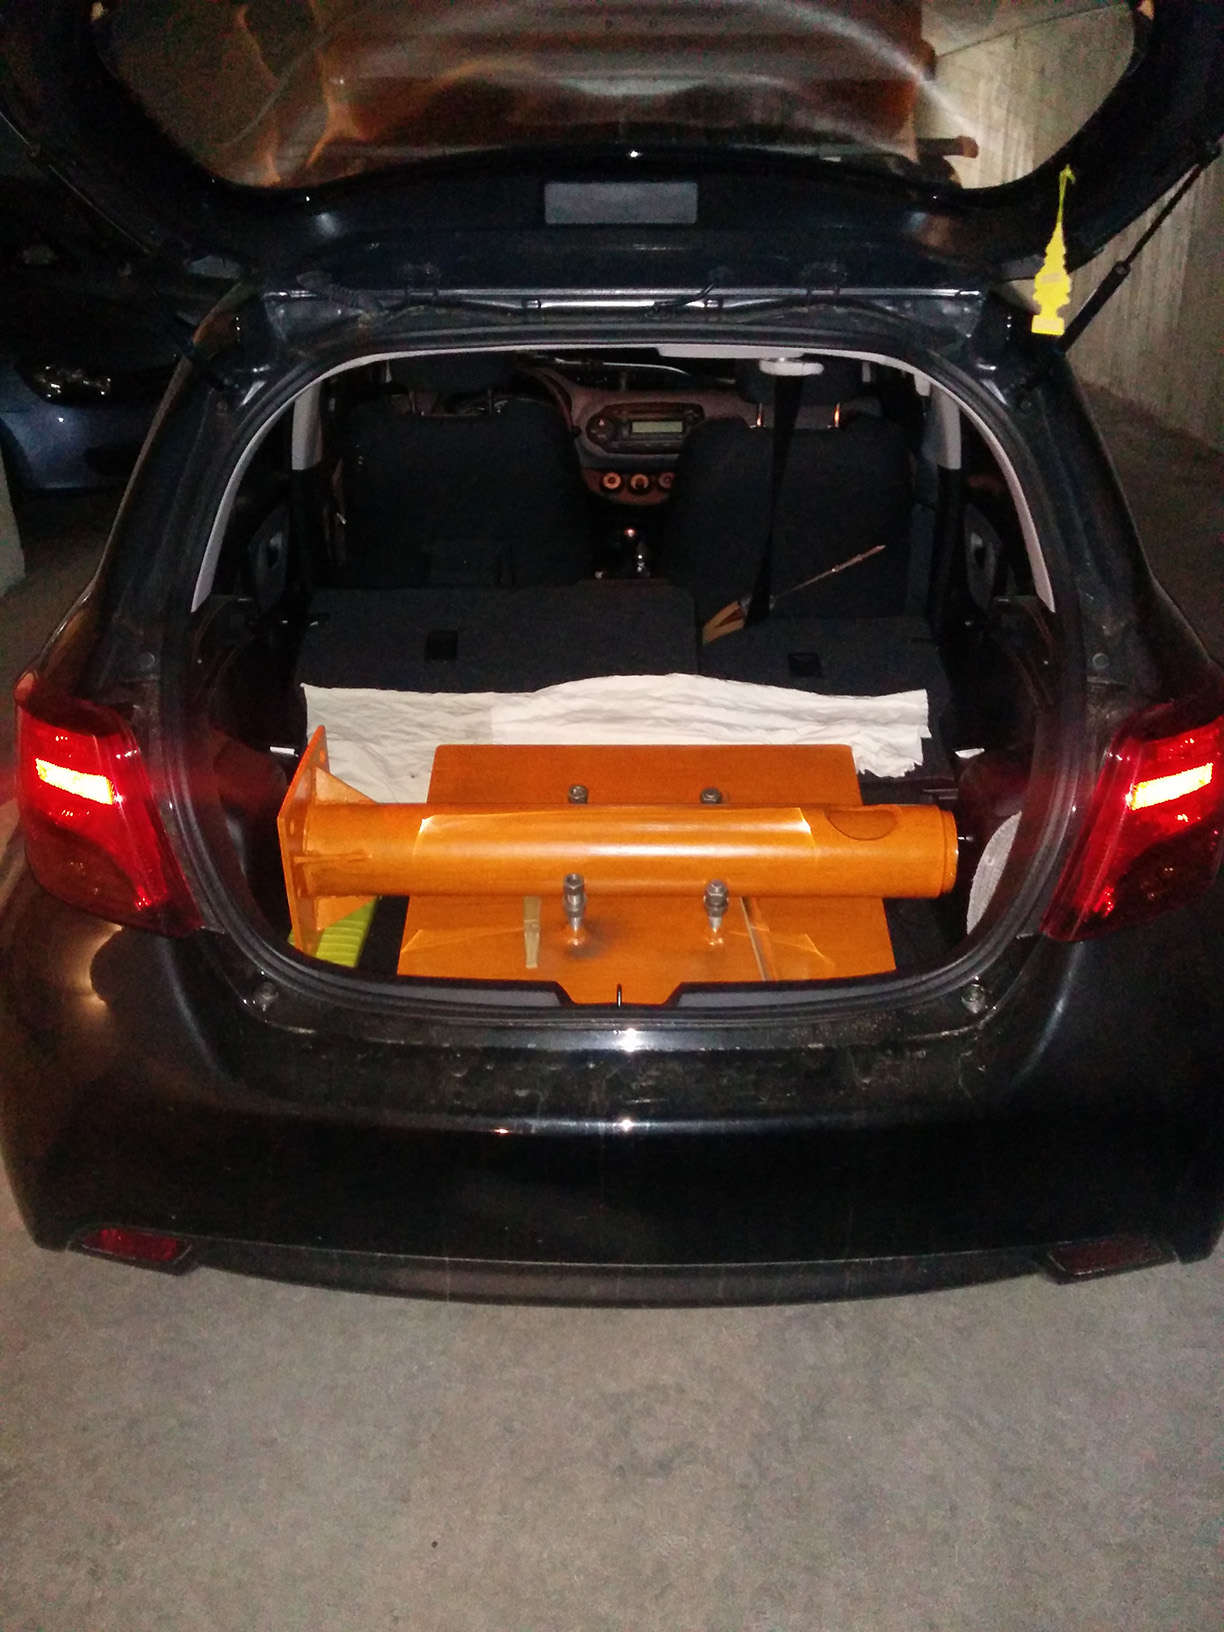 The pier and the base plate ended up weighing some 75kg, which we had to haul in the 5th floor (rooftop) by the stairs since there is no elevator yet 😀
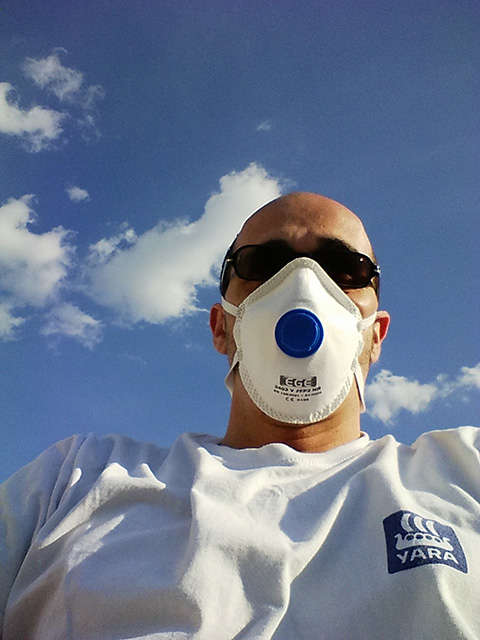 Oil paints, 2 part epoxy glue, white spirit solvents and in general chemicals require some kind of protection. Thus the mask for the fumes and the glass (i am nearsighted(myopia) but they work as protection from splinters, most of the time at least..)
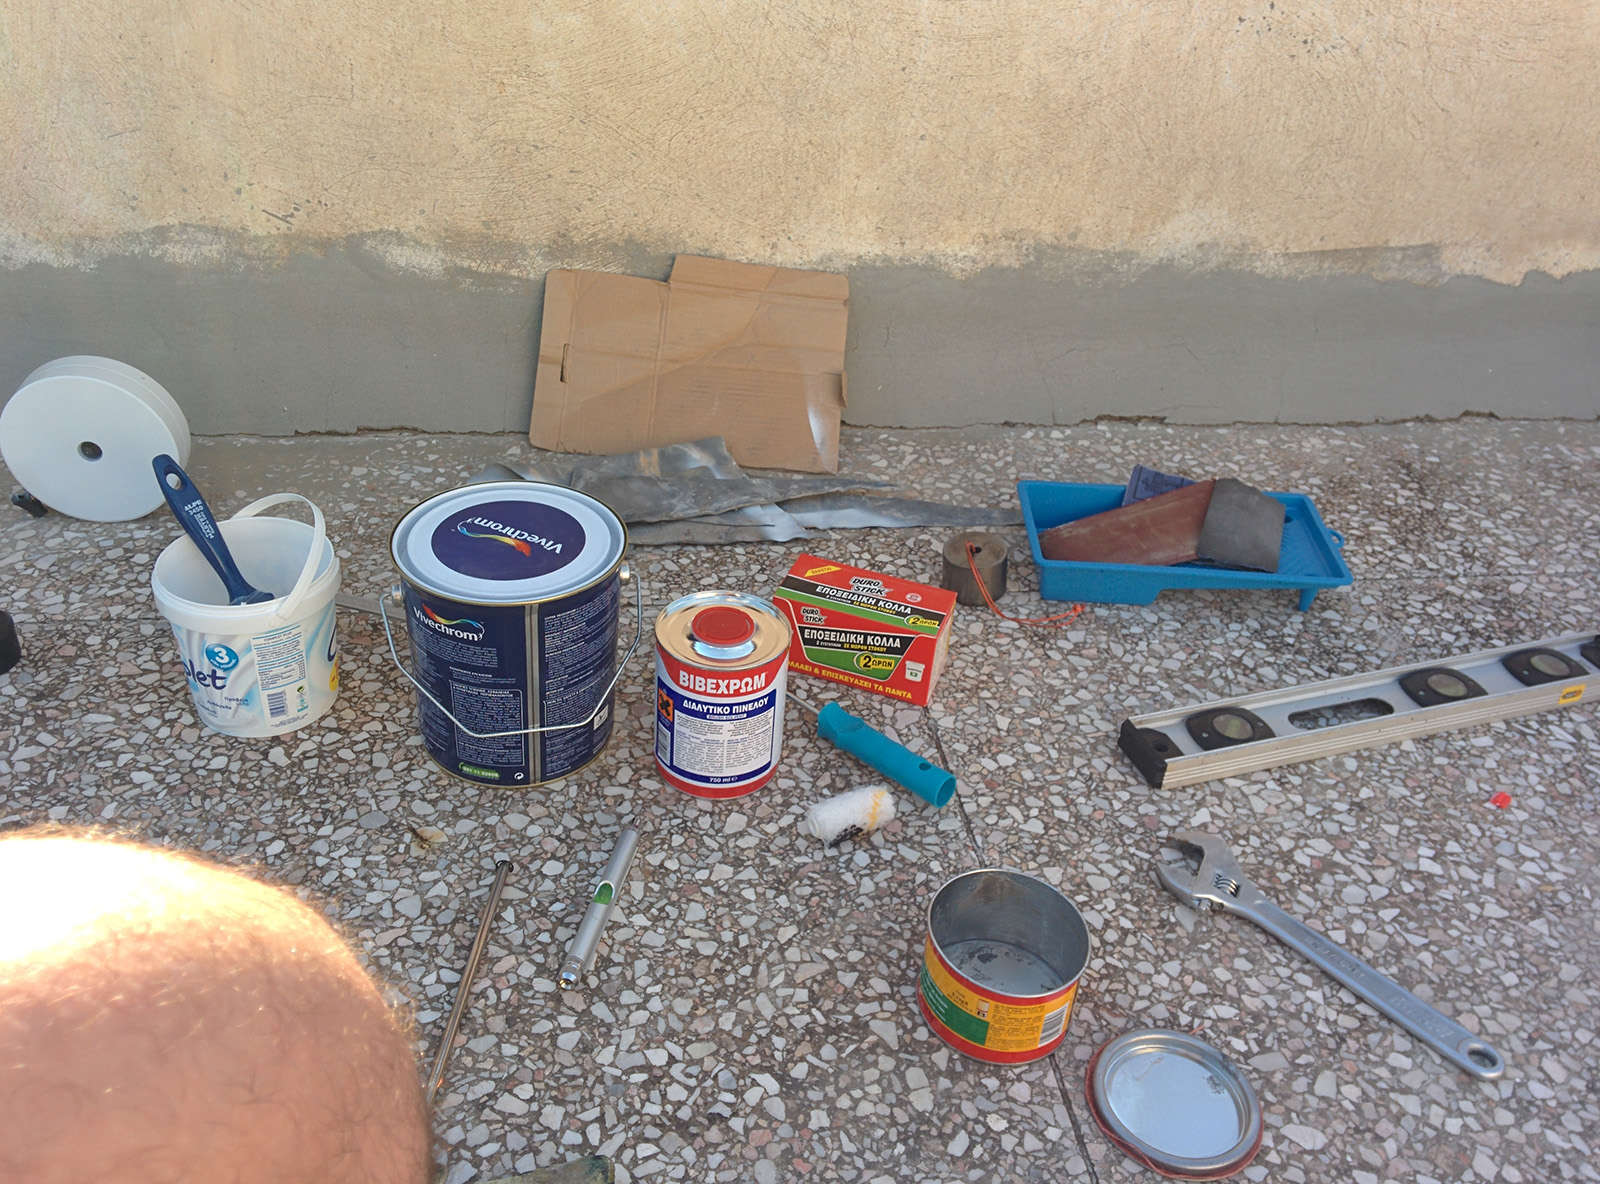 Various assortments for gluing, sanding and painting of the pier
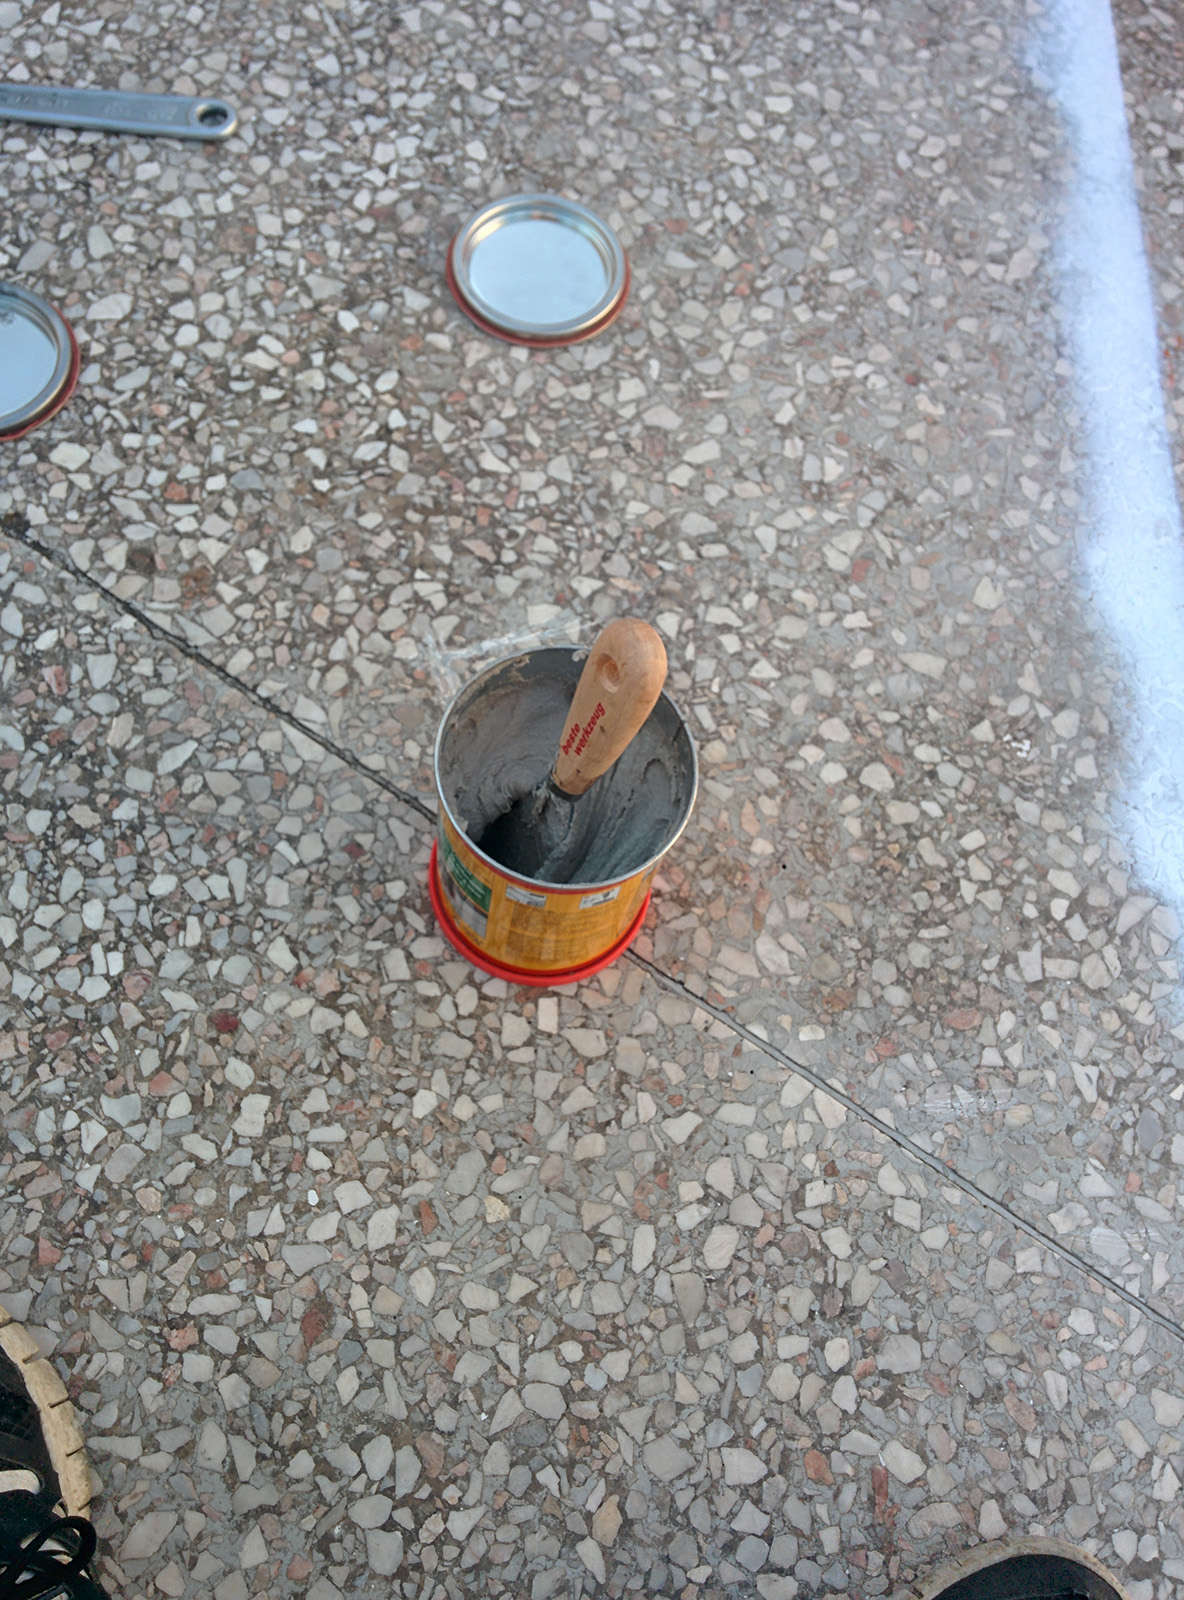 2 part epoxy cement. Yes, this stuff is from hell so do wear gloves, berathing mask and general protection.
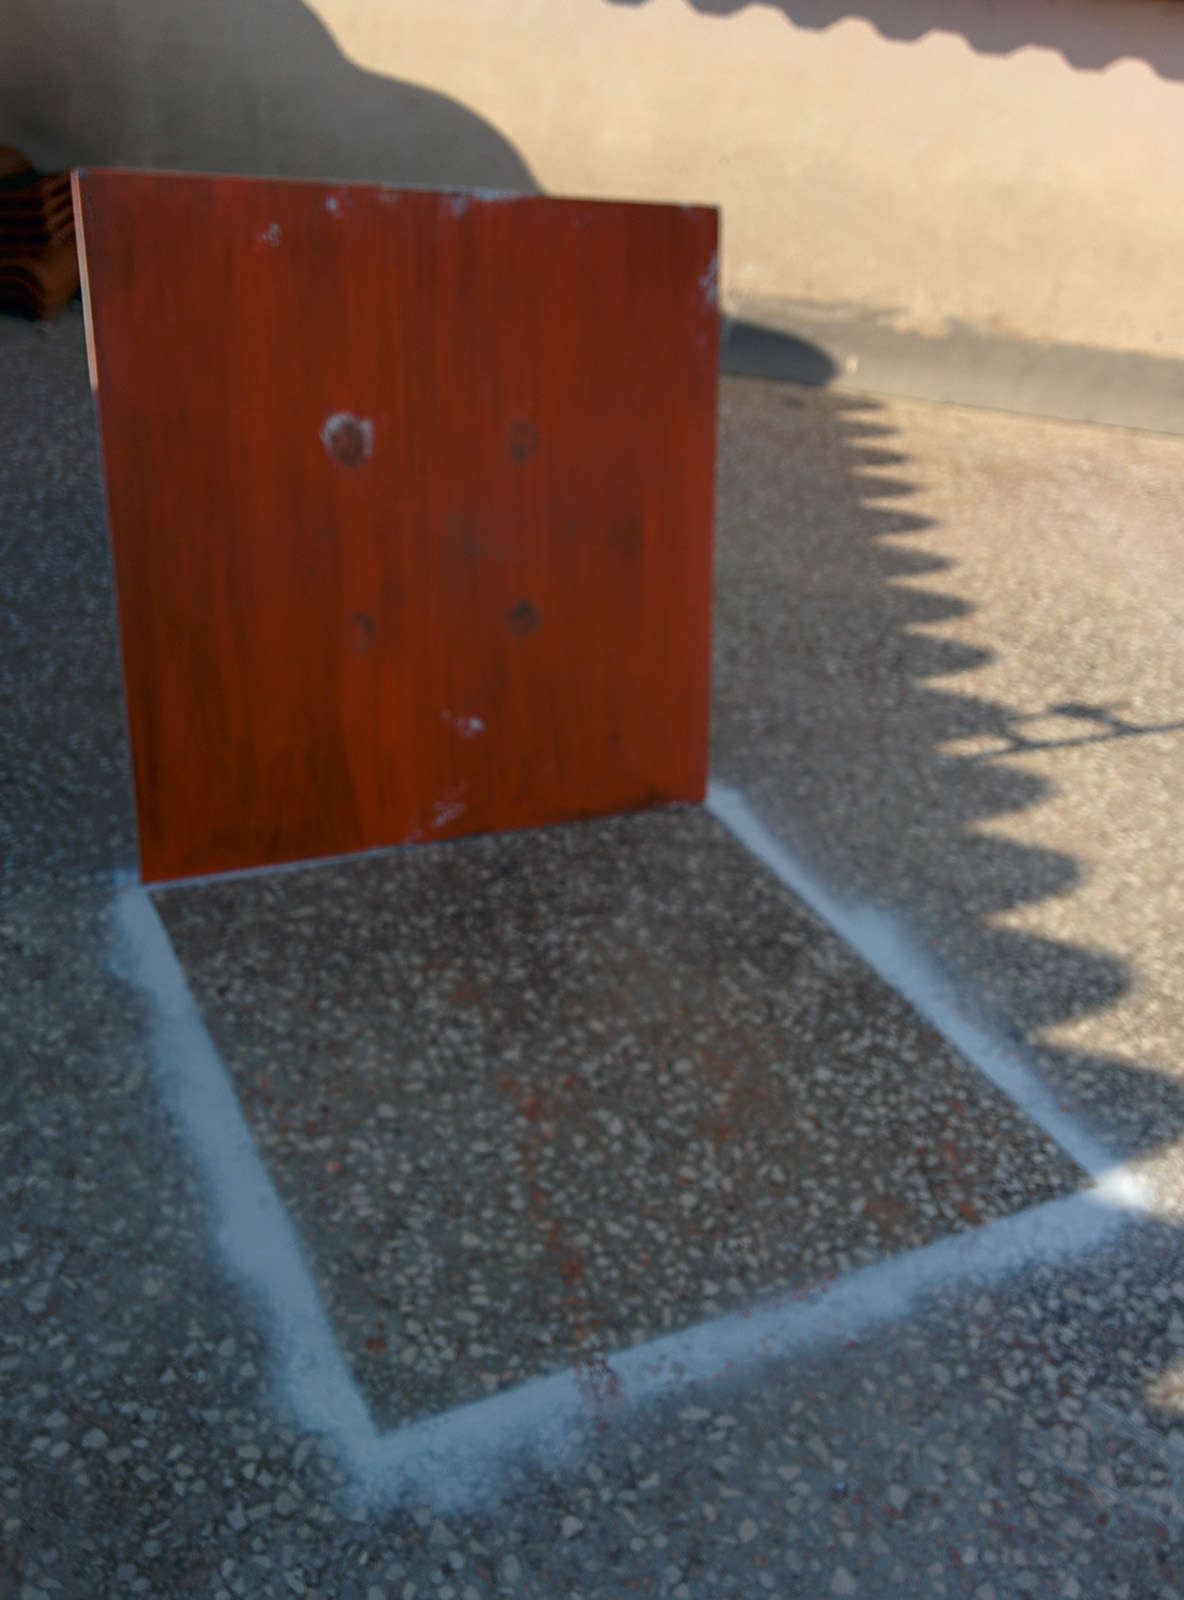 The base plate orientation was tagged with white spray the previous night after a rough polar alignment.
 Finally ready after two hands of oil painting, sanding in between and gluing the base plate to the floor. By the way the 2 part epoxy resin turned out to be massively better than its description. After allowing the 24 hour requirement for it to be properly cured i would need some kind of demolishing device to remove the base from the floor!
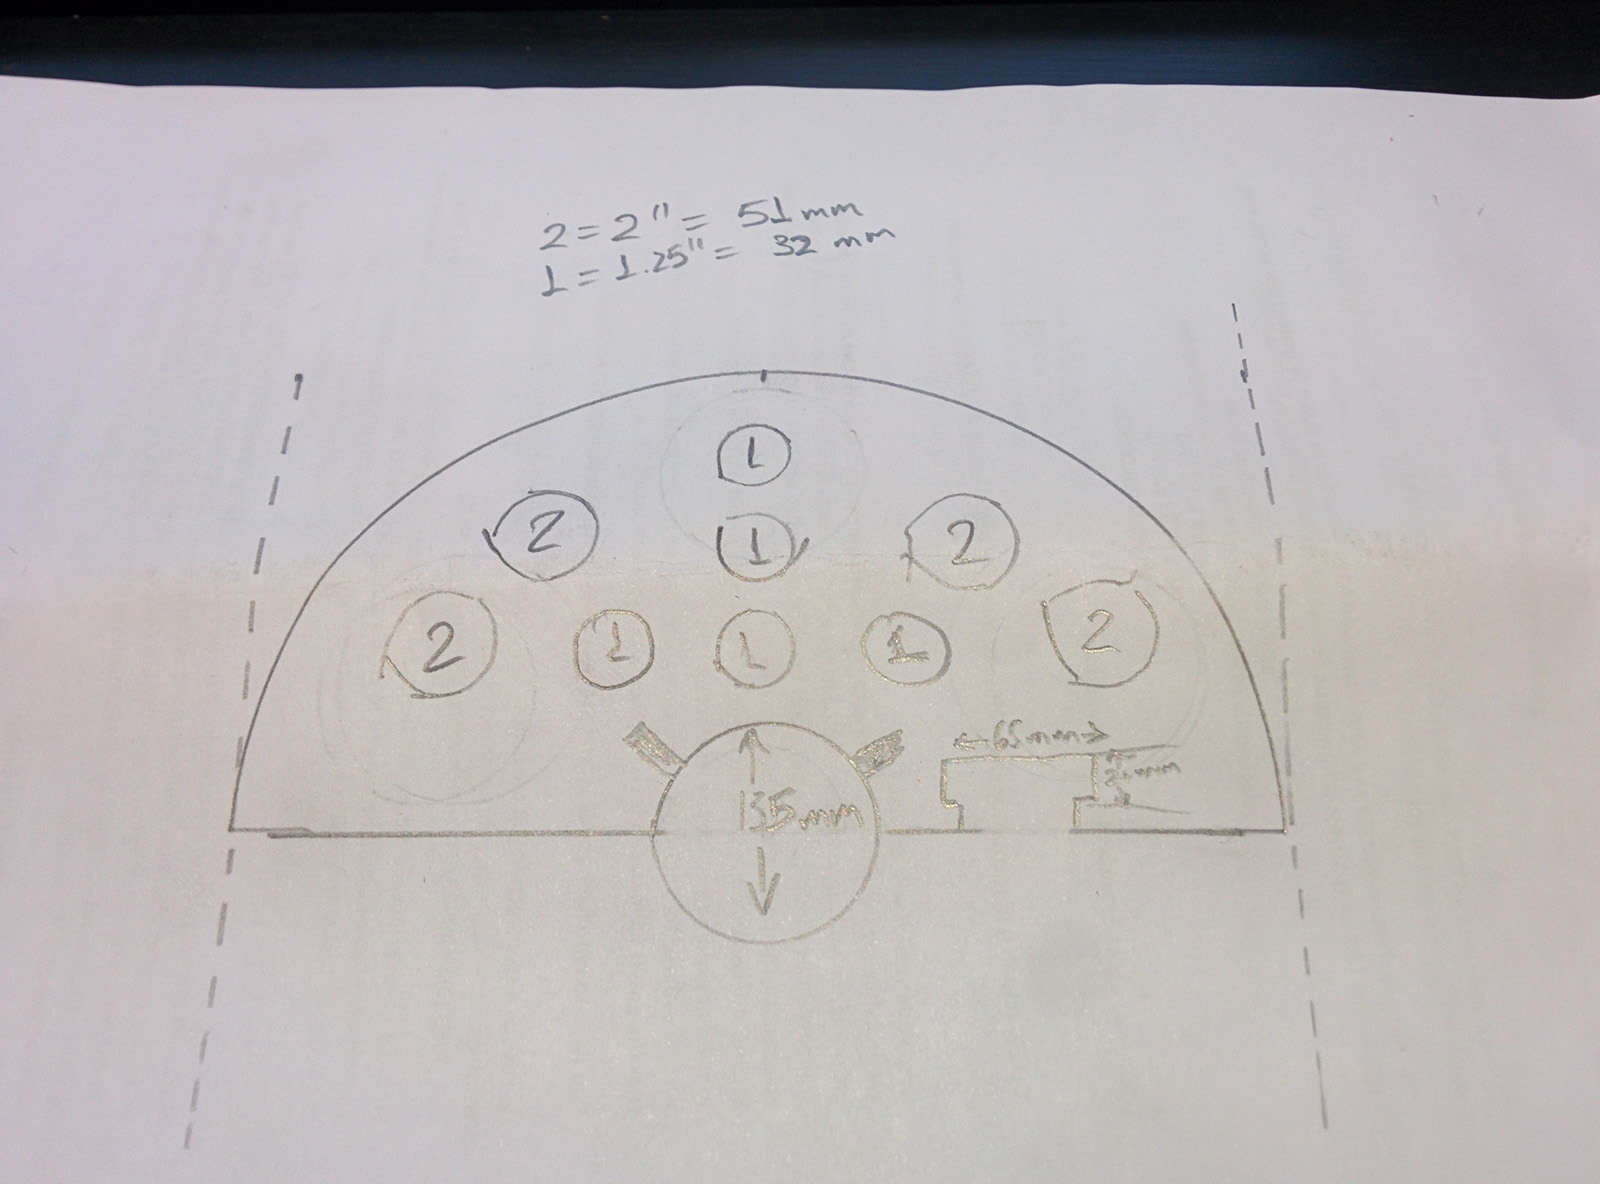 Super design skills at work here in order to make the blueprint for the holes and cuts needed on the plexiglass accessory tray.
 Future upgrade plans include building a proper astronomy shed – observatory around it but that will have to wait for a while 😀
Kudos to Tommy, for the help!